Send It! Automations
A Send It! automation is the quickest way to get your email out the door to the members of one or more Lists.
You could think of a Send It! as a "quick email blast".
A Send It! Automation sends a single email to your recipients based on membership in any number of Marketing and/or Subscription Lists.
How to Create a Send It! Automation
Within the Paminga email builder there are two ways in which you can create a Send It! Automation.
The first option is within this email itself! In the top right corner you will see the “Send It!” button.

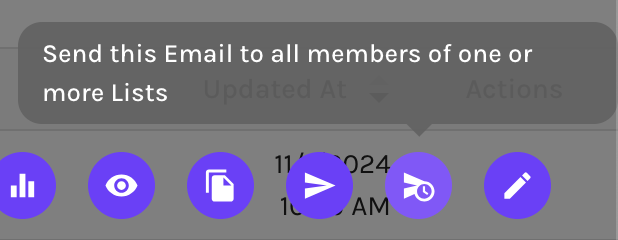
The second option is via the Actions tab on the Emails page.

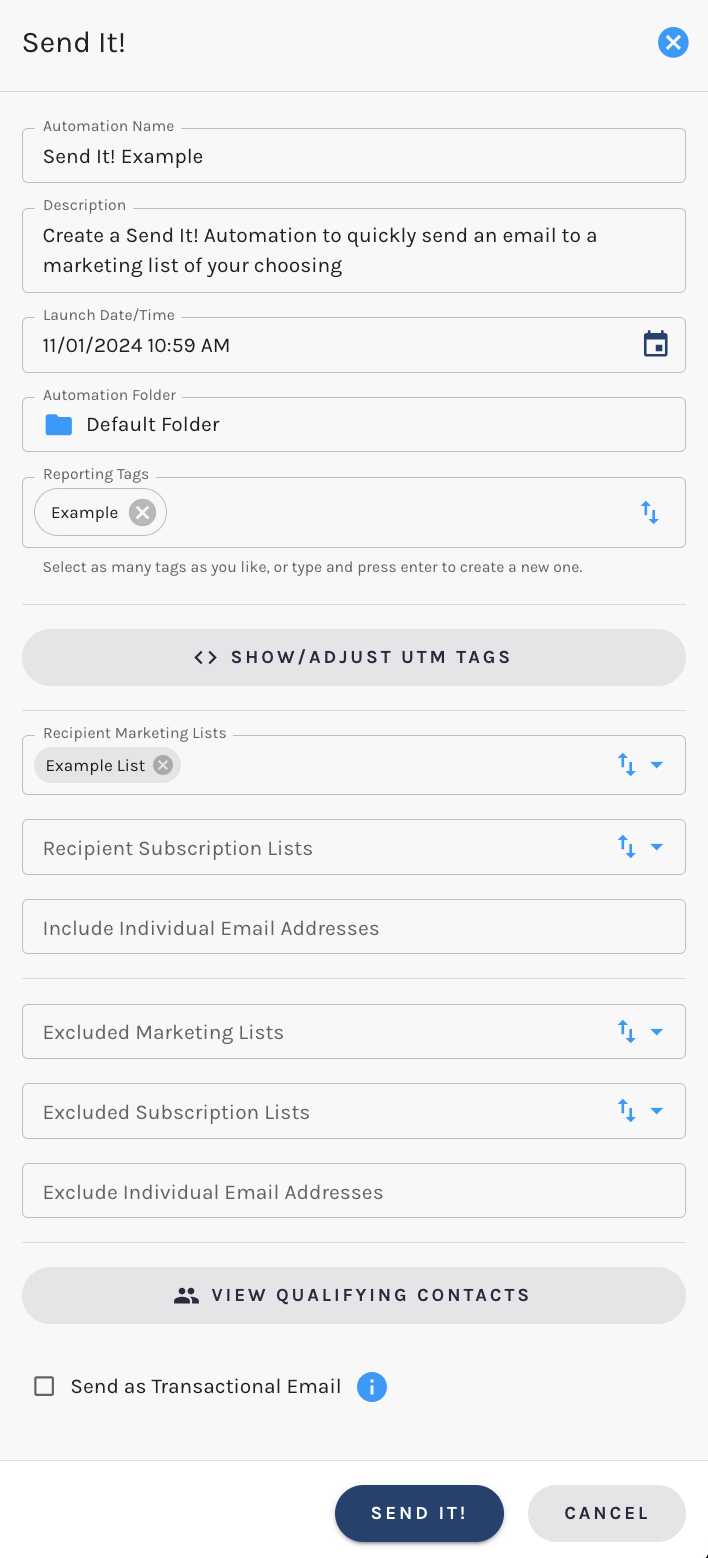
Upon selection of this button, within the email or from the Emails page, a folder will appear that will allow you to set your settings.
Settings
- Automation Name: Provide a name for your Send It Automation
- Description: (Optional) If desired provide a quick description of the Send It Automation for your team
- Launch Date/Time: Set the date and time for your Send It Automation the easy-to-use date picker
- Automation Folder: Choose if you would like to store the Automation within a Folder
- Reporting Tags: Quickly type to select any existing reporting tags, or create new tags on the fly. You can add as many tags as you would like
- Show/Adjust UTM Tags: Expand to view or edit your automations UTM tags
- Recipient Marketing/Subscription Lists: Type to select any Marketing or Subscription lists you would like to be included in your Send It Automation
- Include Individual Email Addresses: If you would like to ensure an individual receives this specific email, type to enter their email address
- Exclude Marketing/Subscription Lists: Type to select any Marketing or Subscription lists you would like to be excluded from your Send It Automation.
- Exclude Individuals: If you would like to ensure an individual does not receives this specific email, type to enter their email address
- Send as Transactional Email (checkbox): Select this checkbox, if you would like to send as a Transactional Email. Please ensure not to use this for marketing emails

Activating your Send It! Automation
Once all settings have been set, your Send It Automation is set up and ready to go! To activate, select “Send It” and your Automation will be sent on the date and time of your choosing.
This Automation and any other Send It Automation statistics will be available to you via your Automation Dashboard.
