Create a New Form
To create a new form navigate to Marketing Center > Forms > and select the + icon.
From the form table in the top right corner you can also select the button "Create a Form "
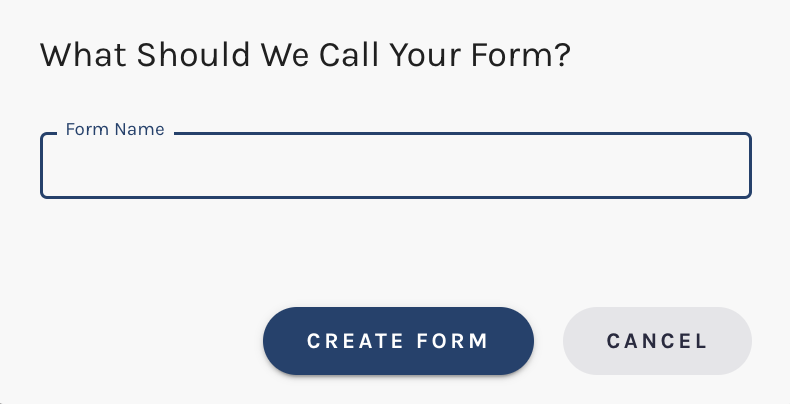
Selection of either of these options will present a pop up in which you are prompted to name your form. Once you have entered your forms name select "Create Form" and you're ready to start building.
Upon naming, you will be taken to the builder. By default, you will see the form already has a few preset and mapped fields. These are:
- Text Field Titled “My Form”
- Email Address
- First Name
- Last Name
All of these fields can be edited or removed if needed!
Setup
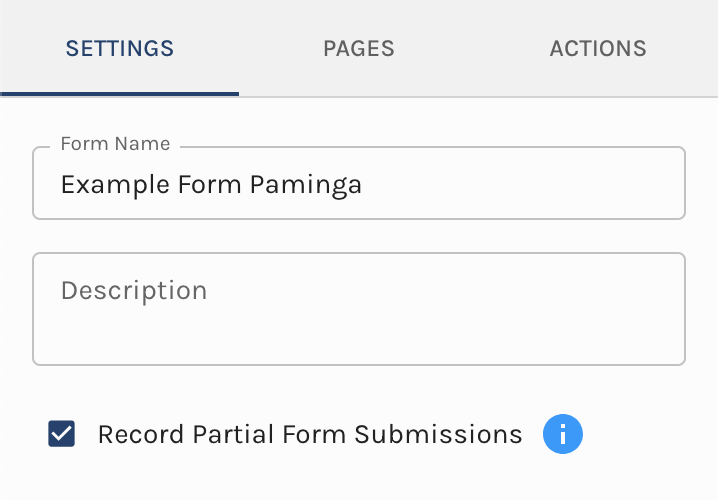
When you initially create a new Form on the left side of the builder you will find tabs for the Settings, Styles, and Actions of the form.
Settings
Here you can edit the settings of the form. This inclues
- The form name
- A description of the form // We recommend adding a description for the ease of other users
- The option to "Record Partial Submissions". If your form has multiple pages, Paminga can record the values entered on each page as a "partial form submission"
- If enabled, when your prospect clicks the "Next" button to navigate to the next page in your form:
- A Contact will be created, if needed, using values submitted on that page
- An Activity Stream entry will be made detailing the values submitted
- If enabled, when your prospect clicks the "Next" button to navigate to the next page in your form:
Pages
If you wish to use multiple pages for your form fields here is where you can do so. Create as many or as little as you would like.
These pages can be displayed always or conditionally based on conditions of your choosing.
You can also set page navigation to redirect your visitors based on conditions you have set to another page, or to submit the form all together.
Learn more about Multi-Page Forms within our docs!
Actions
Under the Actions tab you will be prompted to set the Prospects Experience.
The options include:
- Redirect to a URL: Enter any URL you would like to direct your contact to upon submission
- Display a Thank You Message: Enter the Thank You Message you would like to display upon submission
You can also choose to "Add a Conditional Experince". Doing so allows you to choose the experience your contacts has based on the condoitiona you have set.
For example, if your contact has submitted that they are interested in a specific proudct or service you can redirect them to a landing page that provides mroe information on this product or service.
You have the ability to create as many "Conditional Experiences"
Within the Actions, you will also find the Form Actions that can be leveraged upon Submission. There are two Action Types, Global Actions and Conditional Actions.
Global Vs Conditional Actions
Global Actions occur for all contacts that submit the Form
IE for all Contacts that submit the form add all to a specific Marketing List.
Conditional Actions take place when contacts meet specific conditions of your choosing that have been selected for the Contacts that have submitted the Form.
IE- if you want to assign all contacts whose state does match Colorado to a specific Marketing List, use our Segment builder to select the conditions of Contact Standard Field State Does Match Colorado, and then add an Add To Marketing List action. Choose the List to add the Colorado Contacts to. Upon submission if their state matches Colorado they are added to this list.
To add a Conditional Action select “Add a Conditional Action”.
Once selected, you will be prompted to add a description. This is not required however helpful if you will be adding multiple Conditional Actions.
To set the conditions for the action select “Conditions”.
Here you will see the Goldilocks Segment Builder which will allow you to select the conditions you would like to isolate the group of contacts whom the action will take place for.
Once all conditions are set, select “Apply”.
From here you can set up whatever actions you would like to take for the Contacts that meet the conditions you have set.
You can set as many conditional actions as you would like to take.
Form Builder Components
The Form Builder allows you to set up your Form from top to bottom by combining 3 structural components.
These components are:
- Sections
- Rows
- Elements
Sections
Break your form up into different Sections. Within each Section you can add Rows and Elements. Sections are represented by blue.
Rows
Organize Elements by keeping them in line! Rows can be full-width or have columns. There is no limit to the number of Rows that can be added to your Form. Rows are designated in green.
Elements
Elements are the contents of your Form. These include single-line text fields, dropdowns, checkboxes, and more. Elements are indicated by an orange outline.
To add an Element to your form select the + icon. Available Elements will be displayed. Easily scroll or use the search bar to find the Element you would like to use.